

Theres nothing better than changing out of your work clothes and cozying up to a soft, handmade robe after a busy day. But in case you need a little convincing, we put Meg of MegMade Sewing to the test and one things for sure: were ready for a little rest and relaxation. This self-care DIY project inspired by Januarys Doodle-a-Day challenge can be customized to your liking and doesnt require a patternjust a little math and 2-3 yards of Organic Cotton Knit!
Meg: Creating this DIY lounge robe featuring a design from ellolovey to coincide with designer Rhianna Wurmans Doodle-A-Day challenge was total kismet. One of my favorite designs in Rhiannas shop is this whimsically adorable Tea Kettle House, which suited the January theme of Self Care perfectly. One of my go-to low effort, big impact self-care strategies is taking a moment to make a cup of herbal tea when anxious feelings begin to overwhelm me. I was so delighted to see the design in her shop and to use it for comfy loungewearand a convenient reminder of a simple self-care tool!
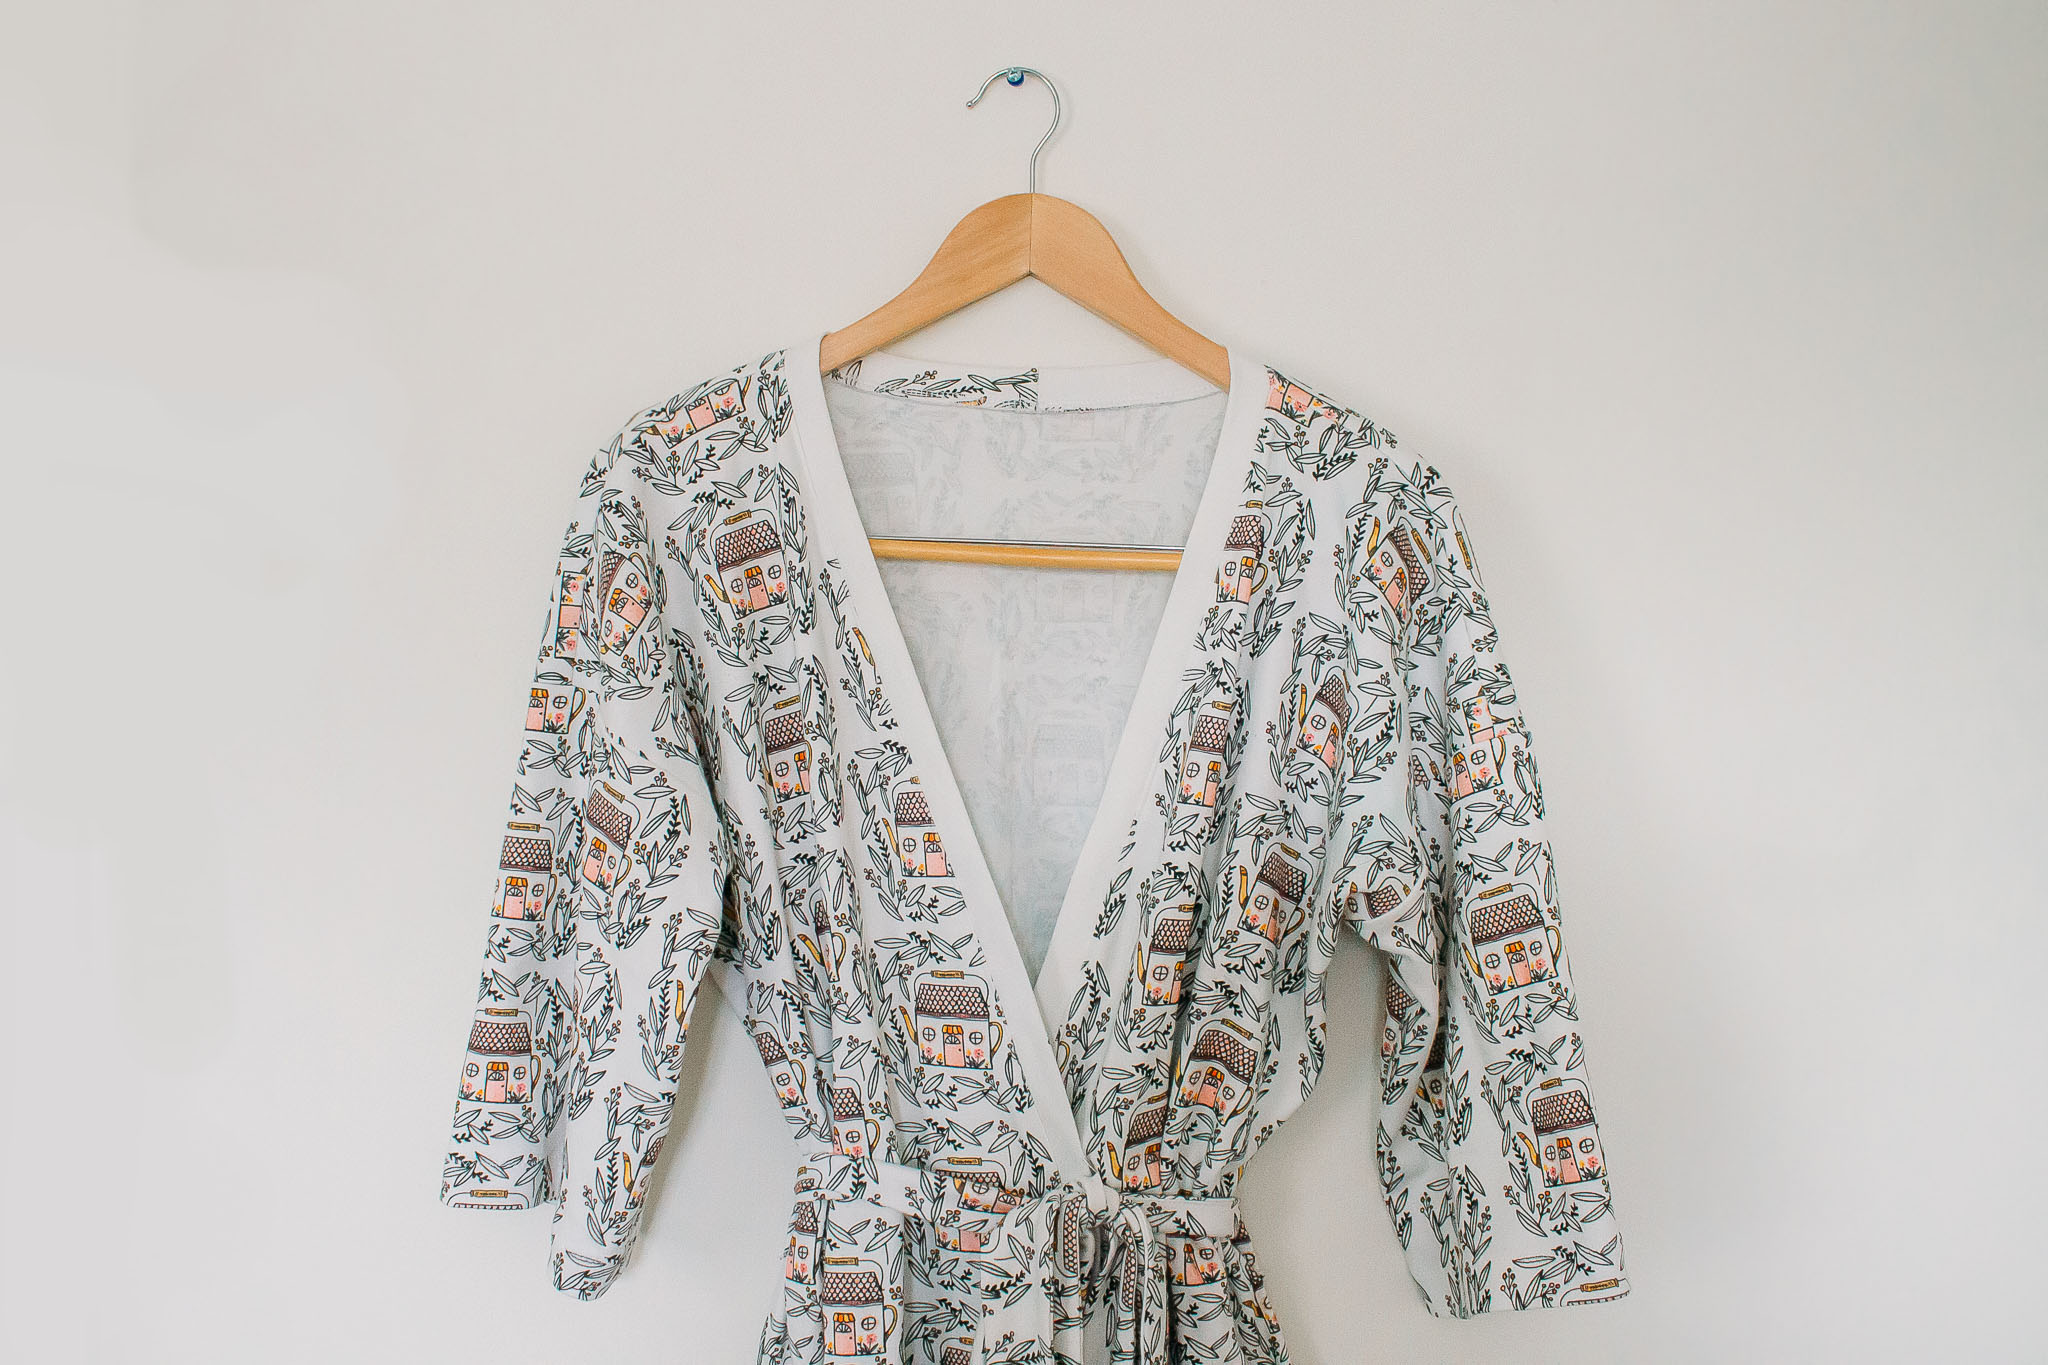
With simple acts of self-care in mind, I created this DIY lounge robe tutorial (with a free measurements printable!) in which to cozy up with a cup of tea and a light-hearted book or to pop on when you need a little handmade hug. Using Organic Cotton Knit means you can make a lounge robe that is unapologetically you and features a design that brings you joy, whether thats journaling, a vase of fresh flowers or even a cup of tea poured from a darling cottage tea kettle.
DIY Custom Lounge Robe
I designed this lounge robe with a slimmer fit thats below-the-knee and has a cropped sleeve. If you want an actual bathrobe youll probably want to add extra width. Feel free to adjust the robe and sleeve length measurements to suit your style!
As a reminder, all seam allowances are 1/4 unless otherwise stated. I like to use 1/4 seam allowances here because it maximizes your fabric yardage, there are no seams to trim, and if youre using a serger it lines up perfectly with the width of a four-thread overlock stitch without having to trim anything.
DIY Lounge Robe Supplies
- 2-3 yards of Spoonflowers Organic Cotton Knit*
- Rotary cutter or fabric scissors
- Cutting mat
- Marking tool
- Ruler
- Pins or wonder clips
- Sewing machine (a serger is nice to have but by no means required!)
*For reference, my bust measures 44 and I used 2 yards of fabric selvage to selvage. For bust or hip measurements greater than 44 I recommend 3 yards.
Before you get started, make sure to prewash your fabric.
1. Take Your Measurements

First, download the free DIY Lounge Robe printable, fill in your measurements, and then complete the equations to determine the dimensions of your pattern pieces. This handy printable will make it much easier to keep track of your math and pattern pieces! Also note that the printable lists important cutting info like which pieces are cut mirrored and which are cut on the fold, as well as the grainline since the direction of stretch is crucial with knit fabrics.
2. Prep Your Fabric
Cut out your pattern pieces according to the measurements on your printable.
3. Prepare the Front Pieces

Divide your neck measurement in four (or neck x .25) and, keeping your pieces mirrored, mark this measurement along the top edge of your fabric. Next, starting at the top, measure down the center front of the length of your neck-to-waist measurement, and mark. Draw an angled line connecting the two marks and cut to create the robe opening.
4. Prepare the Back Piece

With the back piece still folded in half, measure that same quarter neck measurement along the top edge, starting at the fold. Next, starting at the top, measure down the folded edge 1.5. Draw a curve (a french curve or similar tool is helpful!) connecting the two marks to create the back neck curve.
If you didnt already calculate your shoulder seam on your printable, measure your newly cut shoulder now.
With right sides together, sew fronts to the back, pressing seams towards the back.
5. Attach the Sleeves

First, mark the center at the top of both sleeve pieces. Make sure the grainline is running down the arm, with the stretch wrapping around the arm. Match the center mark to the shoulder seam, and pin the rest of the sleeve to the front and back. Sew right sides together and press seam towards the sleeve. Repeat on the other side.
6. Prepare the Belt Loops (optional)

Fold each loop piece in half right sides together, lining up the long edges. Sew with 1/4 seam allowance along the long side and turn each loop right side out.These loops can either be inserted in the side seams at the waist point in the next step or sewn on to the finished robe later.
7. Sew the Side Seams

Match the front and back sleeves and bodices right sides together. If youre inserting sash loops, insert one in each side seam at this point. Sew the entire length of each sleeve and side seam together and press seams towards the back.
8. Check the Sleeve and Hem Lengths
Try your robe on and double-check the length of the robe and sleeve. If satisfied, fold the sleeve hems up by 1, wrong sides together, and sew with your preferred stretch stitch. Finish the bottom by folding the bottom hem up 2, wrong sides together, and sew with your preferred stretch stitch.
9. Prepare the Neckband

If you havent already done so, measure the entire length of your robe opening and add 3/4 to determine the length of your neckband. Youll likely have to divide this measurement into two pieces of fabric.
Sew the neckband pieces right sides together along the shortest side to create one long strip and press the seam open. Next, fold the neckband in half lengthwise, right sides facing but do not press. Sew the ends of the neckband closed with a 1/2 seam allowance and clip the corners at the fold. Turn the corners out. Finally, fold the entire neckband lengthwise, wrong sides together, and press.
10. Attach the Neckband

Mark the center of the neckband and match the center mark to the center back of the robe, right sides together. Next, match each end of the neckband with the hem of the robe, taking care to keep the neckband untwisted. Pin the rest of the neckband evenly down each side of the robe, stretching the neckband slightly along the curve of the neck.

Sew the neckband to the robe with 1/4 seam allowance. Press the seam towards the robe and topstitch if desired.
If you didnt insert the optional belt loops in the side seams earlier, go ahead and mark your waist on each side seam of the robe and attach a belt loop to each side by first folding the raw edge over and then topstitching the belt loop to the robe, repeating for the top and bottom of the loop.
11. Sew the Tie Belt

Sew the two belt pieces right sides together along the shortest side to create one long strip. Fold the belt in half lengthwise, right sides together, and sew around all three raw edges with 1/4 seam allowance, leaving about a 3 gap to turn the belt.

Clip the corners and turn the belt right side out through the opening. Use a point turner to poke out the corners. Neaten up the opening, align the folded edges, and stitch the opening closed by hand or by machine.

Feed the tie belt through the belt loops and youre done!


I hope you enjoy your new lounge robe and that your handmade hug brings you happiness. If you make a lounge robe with this tutorial Id be so delighted to see it! Just tag your makes with #spoonflower and #megmadesewing. Happy sewingand self-caring!
About the Guest Author

Meg is the maker & mama behindMEGMADE Sewing. Having been sewing since childhood, Meg now creates handmades as a way to stay connected to who she is while knee-deep in motherhood. Never in one place for too long, she and her family of five currently call the Washington DC area home. For more of her latest makes (and love of pink!) follow Meg onInstagram.