
This is one of the very first tutorials I put together! We posted it back when just launched Craftbuds and before we had many followers. My totes continue to be something I often use so here’s the tutorial for making a homemade tode bag.
I’d like also to invite you to check another tote bag tutorial we have posted more recently.
You can scale the size up or down for whatever purpose you have in mind. I make two sizes generally. One is a small tote that’s great for a few toys, extra shoes, or even wrapping up a gift. The larger size is great for groceries, farmer’s markets, extra toddler clothes/toys when going out for the day, or as a beach bag for instance. It’s about the same size as a paper grocery bag.
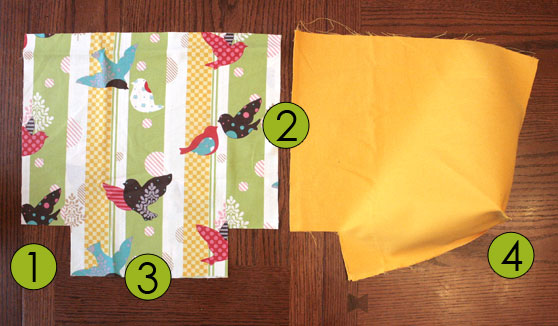
For this pattern, you’ll need an outer fabric and a liner fabric. I like at least one of the fabrics to be a heavier weight to help the bag hold its shape a little better. All seam allowances are 1/2″ unless otherwise noted.
Step 1
Small size: Cut 15″ squares from both your outer and lining fabric with the centerfold of the fabric at the bottom of the square. (If you do it this way, you’ll be cutting through two layers of fabric, and if you were to open it up, you would have a rectangle of 15″ x 30″.) At each of the bottom corners, cut a rectangle 2 1/2″ tall by 3″ wide. If the fabric you’re using doesn’t allow you to have the centerfold at the bottom, you’ll cut two rectangles from both fabrics 15″ wide by 15 1/2″ tall, and your corners will be 3″ square.
Step 2
Put the right sides together for the outer fabric, then stitch up the sides. Repeat with the lining fabric.
Step 3
Stitch that together if you have a raw edge rather than a fold at the bottom.
Step 4
Create the bottom of the bag by stitching the corners. See below for photo detail. You’ll stitch all 4 corners (the 2 for the outer fabric and the 2 for the liner).

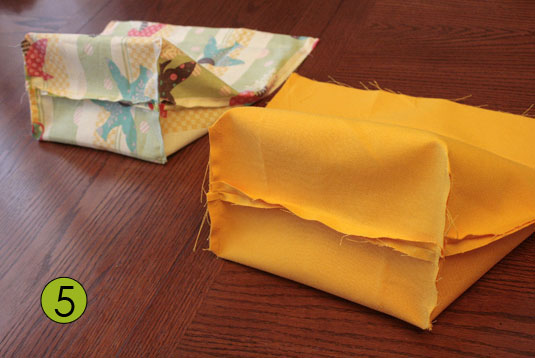
Step 5
Your outer fabric and lining fabric should now look like the photo below, and you can iron the seams flat.
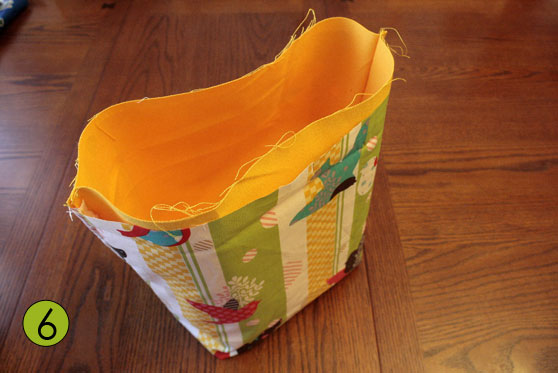
Step 6
Now, flip the outer fabric right side out, then nestle the liner inside.
Step 7
Now pin along the bottom of the bag on the front and back, but not the sides. Stitch along the edge with a 1/8″ or 3/16″ seam allowance.

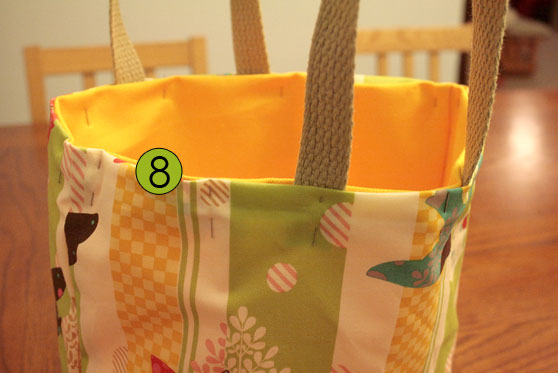
Step 8
Step 9
Now stitch around the top. Leave a 1/8″ seam allowance at the top and sew a second seam 3/4″ down from the top. Then go back and put an X over each strap. Or, if you don’t want to go back and do the Xs later, see the diagram below for the exact steps I followed.


Step 10
Optional: If you want your tote to have a boxy shape, pin the 4 sides going straight up from each corner, then stitch 1/8″ in from the edge as you did in step 7 around the bottom.

And now you’re all done! You should probably go shopping to test out your new bag now!
The post how to sew a tote bag with lining – Step by Step appeared first on Craft Buds.