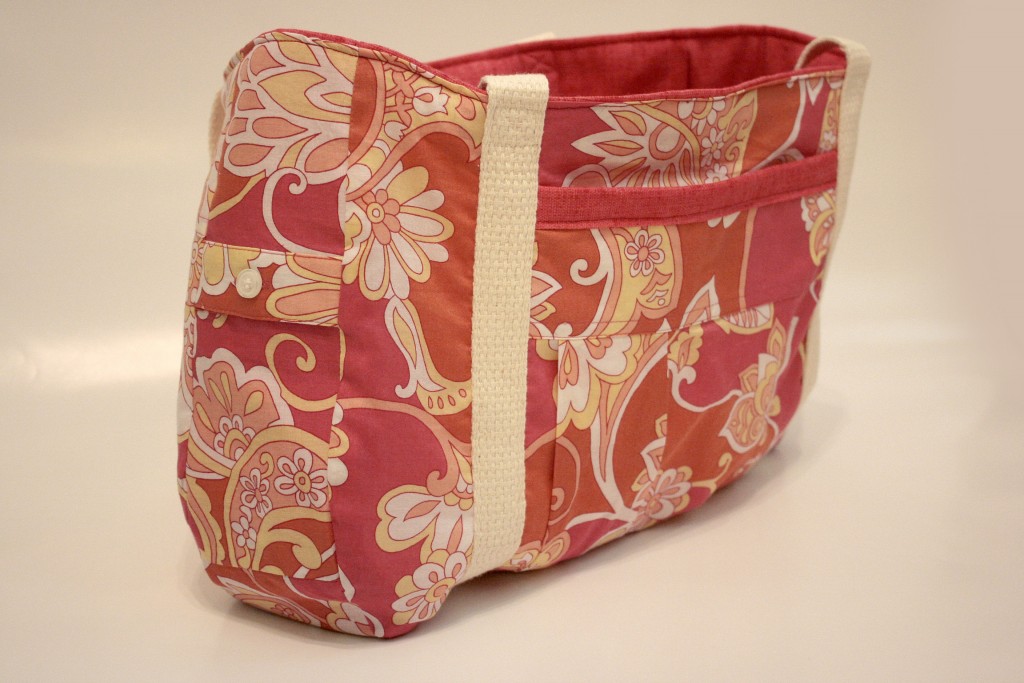
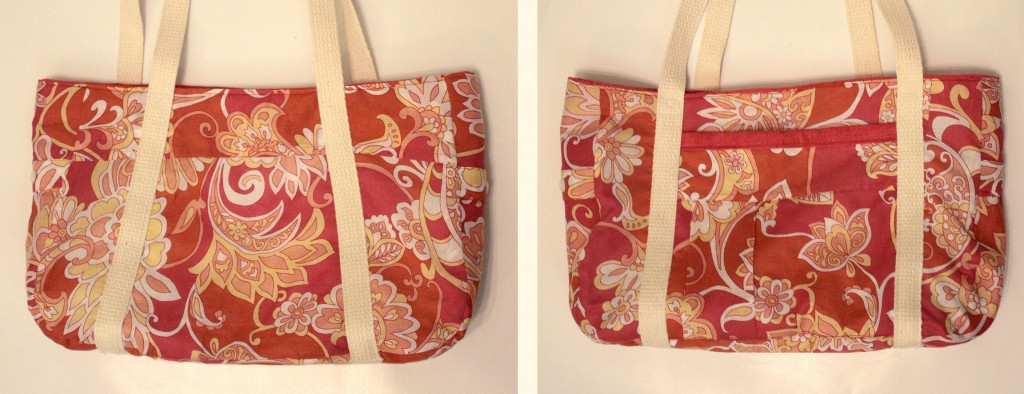
Upcycle a shirt is to take an old shirt of any kind and make it into something new. This is my favorite type of recycling because you get more than one thing out of just one product. Some examples of upcycling are turning the fabric into pillows or pencil cases, and you can even use the sleeves to patch other clothes! I’ll show you how to turn an old shirt into a purse and a Tote bag in this article.
I love all the details you find in clothes: the tiny buttons, pleats, and seams. I wanted to develop a way to use those details to give some thrift shirts a new life. So I designed two purse patterns that use those fun details to their advantage. In this tutorial, I’ll be featuring the instructions and pattern for turning the pink and orange shirt into the tote bag. The shirt I’m using in my pattern is a petite XL. Depending on the shirt you’re using, you may need to scale down the pattern a bit.
Materials you need to upcycle an old shirt
-
One long-sleeved shirt
-
1/2 yard fusible fleece
-
1/2 yard fabric for lining (I used a heavier weight home dec fabric)
-
82″ canvas strap
Step 1
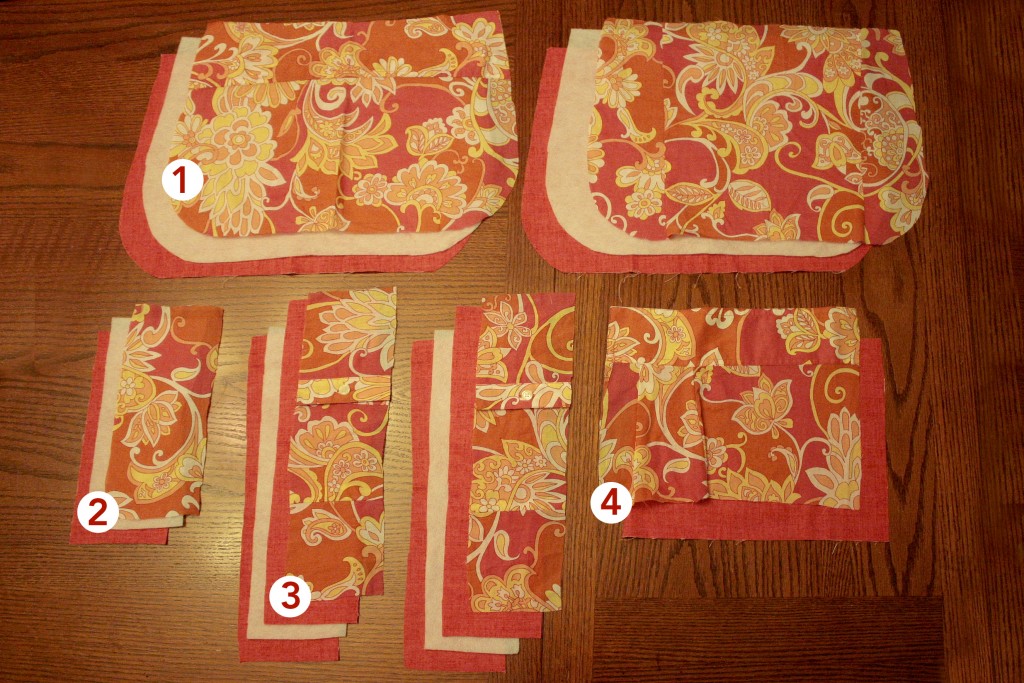
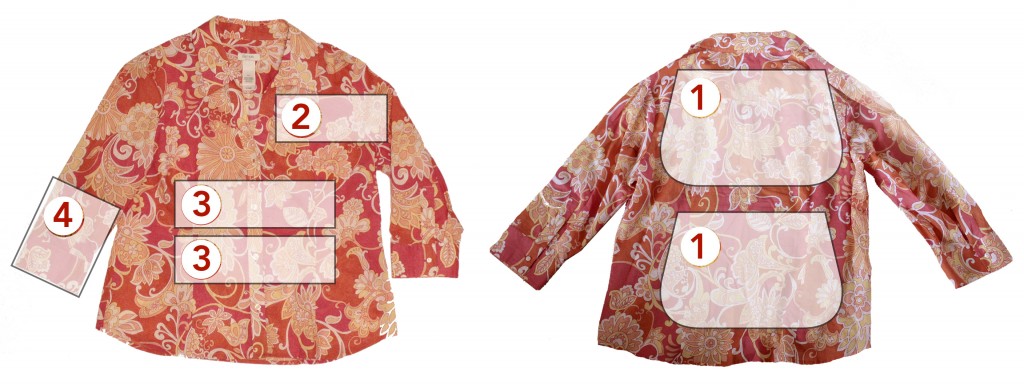
You’ll cut out all the pieces. The following two photos show all the pieces together and also where each piece came from. The numbers correspond to the list below.
-
Using the free PDF pattern that can be downloaded here, cut two each from the shirt (top and bottom of the backside of the shirt), fusible web, and lining fabric for the main body of the tote. The pattern is 2 pages. You’ll want to print both pages out, line up the dots, and tape them together. In your browser, the PDF preview may show the pages are cropped.
-
Cut one 9 3/8″ x 4″ rectangle from the shirt, fusible web, and lining fabric for the tote bottom.
-
Cut two 13.5″ x 4″ rectangles from the shirt and fusible web, and four from the lining fabric for the sides. I cut the shirt fabric horizontally from the front of the shirt with the button 1/3 of the way in. This piece will become a pocket.
-
Cut off the bottom 8.5″ sleeves including the cuff. Use the slit in the cuff, cut it open into a rectangle, and remove any buttons. Mine is 10.5″ wide, but it will vary by the shirt. Also cut a 8.75″ x 10.5″ rectangle from the liner fabric.
Step 2
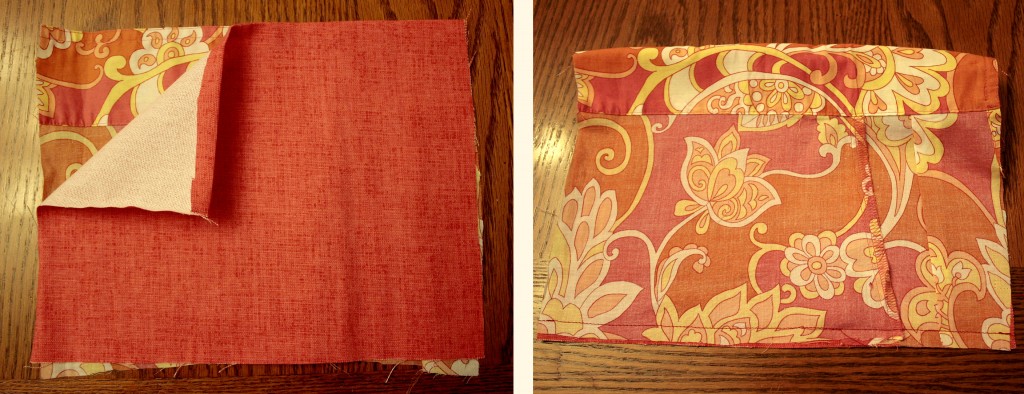
Now that you’ve got all your pieces ready let’s prep the outer pocket. Fold over the top 1/4″ of the liner fabric for the front pocket and iron it down. Then with the wrong sides together, stitch the tops together. Then, flip the fabric, so the right sides are together. Line up the bottom of the two fabrics and stitch them together. Then turn it right side out.
Step 3
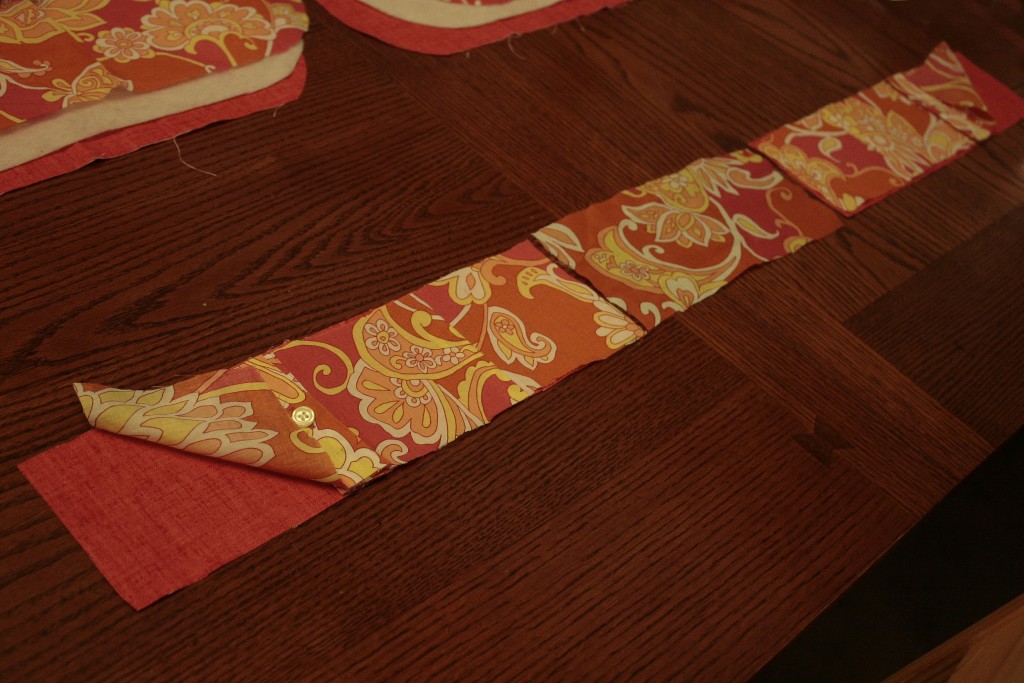
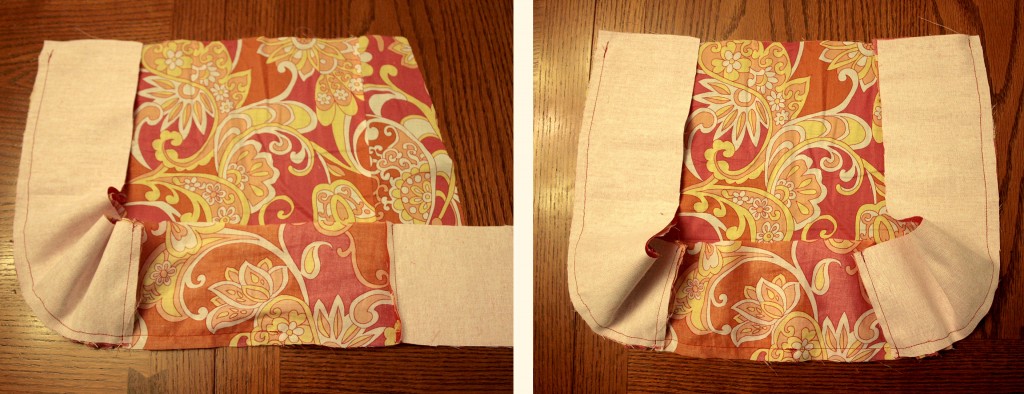
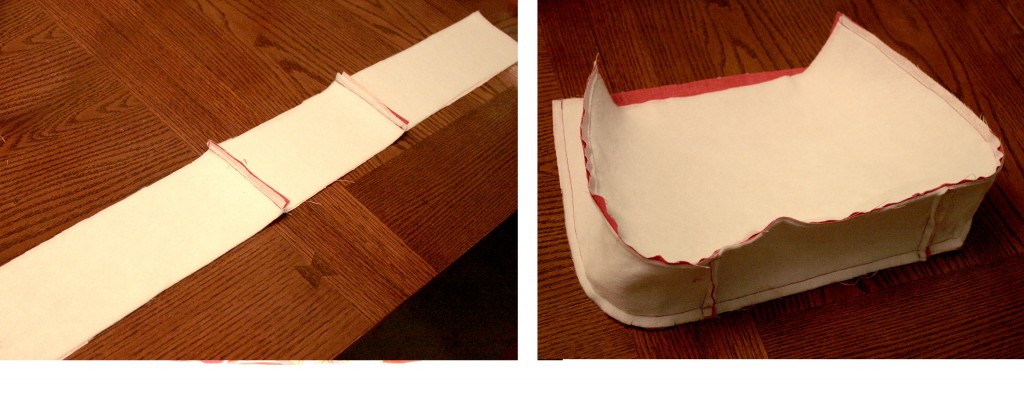
Next, you’ll stitch together the strips for the sides and bottom of the tote. Line up the strips from the shirt face side down (side, bottom, side). Place the liner strips on top of the two side strips (these will line the side pockets seen in the photos at the bottom of the post) and sew them all together with the right sides together.
Step 4
Then with the right sides together, sew the side/bottom strip to one of the main body pieces. Then sew on the other main body piece (not pictured) and turn it right side out. I found it easier to line up the center and sew from the center out to the top. Then I went back and did the other side.
Step 5
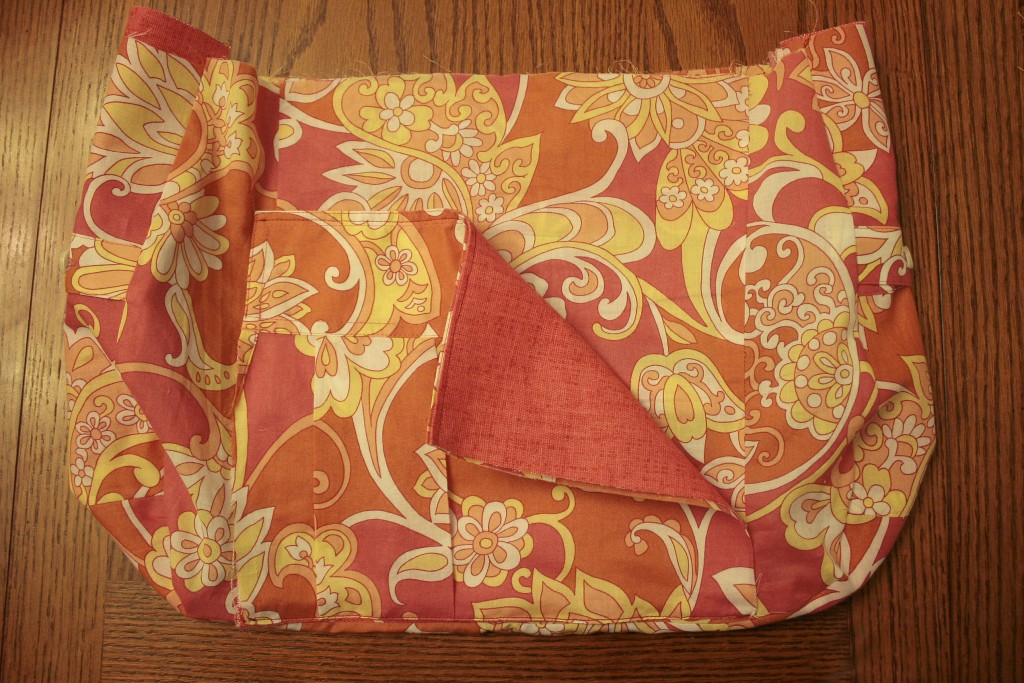
Stitch the pocket along the bottom seam. The pocket will still have raw edges.
Step 6
Iron the fusible fleece to the liner strips for the sides and to the main body pieces. Line up the side strips (side, bottom, side) and sew them together. Then sew that strip to the main body pieces using the same method as the exterior. Trim off any excess material around the seam allowance.
Step 7
Now nestle the liner inside the exterior of the bag. Fold the tops inside 1″ and stitch around the top with a 1/8″ seam allowance.
Step 8
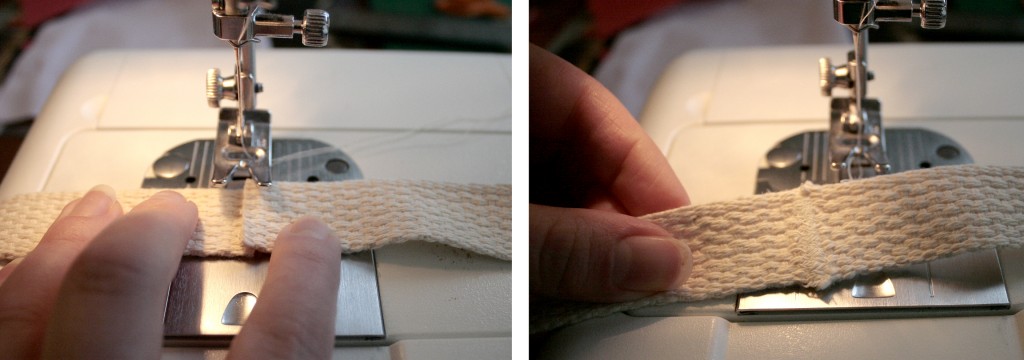
You’re almost done and just need to add the strap! Make sure the strap isn’t twisted and overlaps the edges by 1/8″. Zigzag stitch back and forth over the strap until the raw edges are secured. The strap will now be one big loop.
Step 9
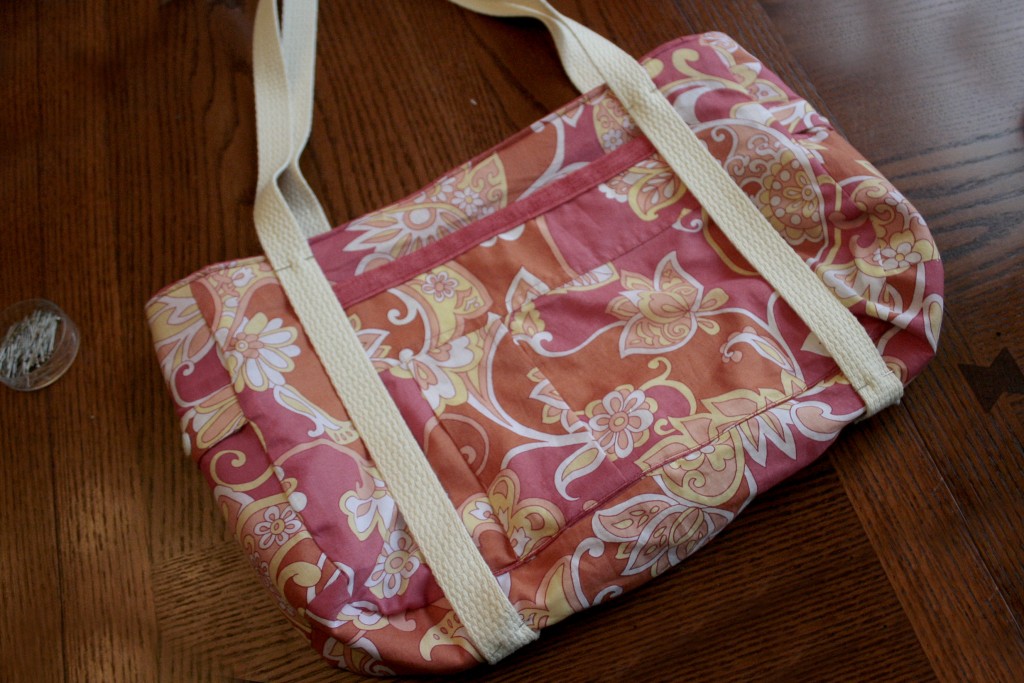
Line up strap with the raw edges of the front pocket. Start by pinning down the zig-zagged seam on your strap to the bottom of the bag. Then pin down the sides. (Before I stitched down the straps, my husband pointed out that the front pocket didn’t stand out so I went back and added the pink strip to the top.) Stitch along both sides of each canvas strap and make an X at the top of each strap.
Step 10
And you’ve made a shirt into a tote! I really like the pleats from the sleeve on the front pocket and the side pockets from the front of the shirt. The side pockets are mostly just for show. In my pattern, they’re too narrow to fit much. If you want them to be more functional, make the side/bottom strips wider.
The post How to Upcycle a Shirt and Make a Tote Bag – Free Pattern appeared first on Art & Craft, DIY ideas and Tutorials - Craftbuds.

